Hello Kindergarten Back to School Tshirt: What to Know Before You Buy and Use This Design
The transition into kindergarten is a milestone that families, teachers, and small business owners alike want to celebrate. A Hello Kindergarten Back to School Tshirt design captures that excitement in a wearable, marketable format. Whether you are a parent looking for a custom shirt for your child, a print-on-demand seller building a seasonal collection, or a hobbyist using a cutting machine at home, understanding how to choose, edit, and apply this type of digital file can save you time, money, and frustration.
Many people assume that buying a ready-made design is a simple download-and-print process. In reality, the difference between a professional-looking product and a disappointing one often comes down to a few overlooked details. This article walks through the most common mistakes buyers and creators make when working with a kindergarten back-to-school design, and how you can avoid them.
Why the File Format Matters More Than You Think
A Hello Kindergarten Back to School Tshirt digital bundle typically includes EPS, AI, SVG, and PNG files. Each format serves a specific purpose, and using the wrong one can ruin your print quality or cause compatibility issues with your software or machine.
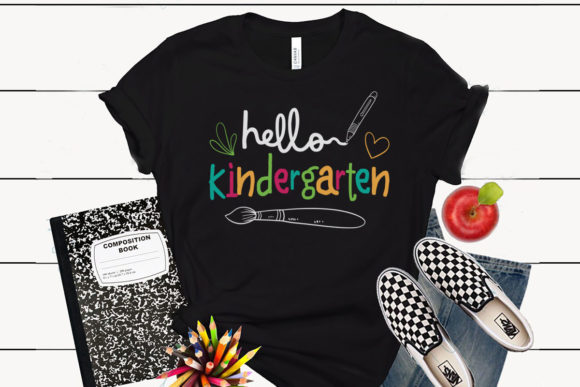
One of the most frequent mistakes is assuming that a PNG file alone is sufficient for all applications. While the PNG included in this design set is high resolution at 4500×5400 pixels and 300 dpi, it is still a raster image. If you resize it beyond its original dimensions, you lose sharpness. For professional printing, especially on large surfaces like hoodies or tote bags, vector formats such as EPS, AI, or SVG are far superior because they scale infinitely without losing quality.
Practical Advice for File Selection
- Use EPS or AI if you plan to edit the design in Adobe Illustrator or a similar vector editor. These files give you full control over colors, text, and layout.
- Use SVG if you work with cutting machines like Cricut or Silhouette. SVG files preserve vector paths, making them ideal for vinyl cutting and layering.
- Use PNG only when you need a quick preview or when the design will be printed at exactly the size provided. Avoid stretching or enlarging PNGs.
Checking the file format before you start your project will prevent wasted materials and disappointing results.
Overlooking Editable Elements in the Design
The phrase "100% editable" is one of the most valuable features of this design bundle, yet many buyers never take full advantage of it. The EPS and AI files allow you to change the text, adjust colors, or modify the layout to fit your specific needs. A Hello Kindergarten Back to School Tshirt design that comes pre-made is a starting point, not a finished product.
A common misunderstanding is thinking that the design must be used exactly as shown in the preview. In reality, you can personalize it with the child's name, change the background color to match your brand, or combine elements with other designs. Sellers who skip this step often end up with generic products that look identical to dozens of other listings on the same platform.
How to Make the Design Your Own
- Open the AI or EPS file in a compatible program. If you do not own Adobe software, free alternatives like Inkscape can handle these formats.
- Change the font to match your style. The bundle includes typography, but you are not locked into it.
- Adjust the colors to fit your brand palette or the child's favorite colors.
- Resize individual elements if you want a different composition. Vector files make this easy without quality loss.
Taking ten minutes to customize the design can elevate your product from a generic template to a personal keepsake or a unique listing that stands out in a crowded marketplace.
Ignoring Bleed and Safe Zones for Printing
When you purchase a Hello Kindergarten Back to School Tshirt digital file, the dimensions provided are typically 12 by 16 inches at 300 dpi. This size works well for many standard t-shirt layouts, but it does not automatically account for bleed areas required by commercial printers.
Bleed refers to the extra space around the edges of a design that gets trimmed off after printing. If your design extends to the very edge of the canvas without bleed, you risk white borders or cut-off elements. Many beginners assume that the design file is ready to upload directly to a print-on-demand service, only to receive samples with misaligned prints or uneven margins.
What to Check Before Sending to Print
- Confirm whether your print provider requires bleed. Most professional services ask for at least 0.125 inches of bleed on each side.
- Keep important text and graphic elements within the safe zone, typically 0.5 to 1 inch from the edge, so they are not cut off during trimming.
- If the design includes white elements, ensure they will show correctly on the shirt color you choose. Some printers do not print white ink unless specified.
For those using sublimation or heat transfer, the same principles apply. Test your print placement on a sample shirt before producing in bulk.
Underestimating the Cutting Machine Setup
SVG files are a favorite among Cricut and Silhouette users because they handle vector paths cleanly. However, not all SVG files are created equal. The Hello Kindergarten Back to School Tshirt design is packaged with a high-quality SVG, but users sometimes encounter issues because they skip the step of checking layers and groups before cutting.
A typical mistake is sending the SVG directly to the cutting machine without verifying that each color layer is separated correctly. If the file arrives as a single combined layer, you may end up cutting the entire design as one piece, losing the ability to use different vinyl colors for different parts of the design.
Tips for Smooth Cutting
- Open the SVG in your cutting software first. Look for grouped layers or separate color swatches.
- If the design is not pre-separated by color, use the contour or ungroup function to divide it manually.
- Adjust the cut settings based on the material you are using. Adhesive vinyl, heat transfer vinyl, and cardstock all require different pressure and blade depth.
- Use a test cut on a small piece of material before committing to your final product.
A little preparation on the front end prevents wasted vinyl and frustration halfway through a project.
Choosing the Wrong Application for Your Business Model
Entrepreneurs and print-on-demand sellers often buy a Hello Kindergarten Back to School Tshirt design with the intention of listing it on multiple products. The product description mentions that the design is suitable for t-shirts, hoodies, mugs, bags, decals, and card making. That is accurate, but not every application works well with the same file.
For example, a design that looks great on a flat t-shirt may need repositioning or resizing to fit a curved mug or a small decal. Sellers who upload the same file without adjustments often end up with stretched proportions, awkward cropping, or lost detail on smaller surfaces.
Better Approach for Multi-Product Selling
- Create separate variants of the design for different product types. A mug requires a tighter crop and different aspect ratio than a hoodie.
- Use the vector files to adjust scale without losing quality. What works at 12 by 16 inches for a shirt will likely need to be smaller and recentered for a tote bag.
- Check each platform's upload guidelines. Some marketplaces require specific file types, DPI settings, or color modes (CMYK vs. RGB).
Taking the time to tailor your design to each product type improves customer satisfaction and reduces return rates.
Missing the Licensing and Usage Details
When you buy a digital design file, you are purchasing a license to use it, not the copyright itself. Many buyers assume they can resell the design as their own or use it in unlimited commercial projects without restriction. The Hello Kindergarten Back to School Tshirt product description states it is intended for creating physical products, but the exact terms depend on the seller's licensing agreement.
A common oversight is using a design file in a way that violates the license, such as selling the digital file itself, claiming authorship, or exceeding a print run limit that the seller imposes. This can lead to your listings being removed from marketplaces or legal action from the original designer.
What to Verify Before Purchase
- Read the license terms carefully. Look for whether commercial use is allowed and if there are any limits on the number of products you can produce.
- Check if you are permitted to modify the design and sell the modified version. Most sellers allow this, but it is not universal.
- If you plan to hire a third-party printer, confirm that the license covers production by a service provider on your behalf.
Keeping a copy of the license agreement for your records is a simple habit that prevents problems later.
Overlooking the Vector Editing Learning Curve
For beginners, the promise of a "fully updated and 100% editable" design can be exciting until they open the AI file and realize they do not know how to use the software. This is not a flaw of the product, but it is a common point of confusion. Hobbyists and small business owners sometimes buy vector files without having the tools or knowledge to edit them properly.
If you are new to vector editing, the SVG file is usually the most user-friendly option because it integrates directly with cutting machine software and basic design apps. However, if you want to make substantial changes, you will need to invest a little time in learning the fundamentals of vector software.
How to Bridge the Skill Gap
- Start with free or low-cost software. Inkscape works well for EPS and SVG files, and many YouTube tutorials cover the basics.
- If you use a cutting machine, the built-in design software often includes basic editing features. You may not need a separate vector program at all.
- Practice on a copy of the file first. Experiment with changing colors, moving text, and resizing elements until you feel comfortable.
Understanding the tools you are working with makes the design process faster and more enjoyable.
Final Thoughts on Getting the Most from Your Design
A Hello Kindergarten Back to School Tshirt digital bundle offers real value for parents, creators, and sellers who take the time to use it correctly. The common mistakes discussed here—choosing the wrong file format, skipping customization, ignoring print bleed, neglecting cutting machine setup, and overlooking licensing—are all avoidable with a little planning.
Treat the design file as a flexible template rather than a fixed product. Adjust it for your specific use case, whether that is a single shirt for a kindergartener or a full product line for your online store. By paying attention to the technical details and making the design your own, you will get better results and a higher return on your investment.