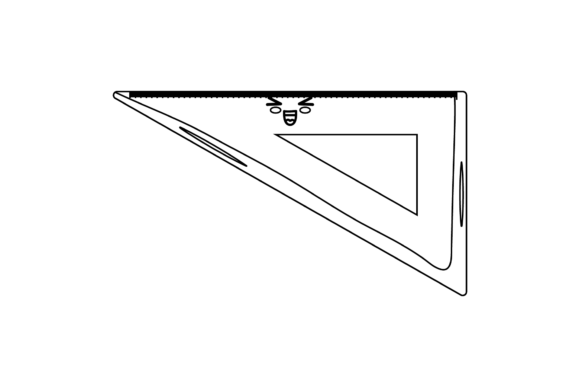
Back to School Triangle Ruler Outline: A Practical Design Resource for Education and Creativity
When you prepare educational materials, classroom decor, or school-themed products, having a clean, scalable vector shape saves time and ensures professional results. The Back to School Triangle Ruler Outline is exactly that—a digital file set featuring a neatly drawn triangular ruler, ready to be incorporated into a wide variety of projects. It is not a finished design in itself, but a flexible building block. Whether you are a teacher designing worksheets, a small business owner creating planner stickers, or a freelancer producing back-to-school marketing graphics, this outline gives you a precise, editable geometry element that fits naturally into your workflow.
The design comes as a single image of a triangle ruler outline, but the value lies in the six file formats you receive. You get an AI, EPS, SVG, DXF, JPG, and PNG file, all at a canvas size of 1920 by 1280 pixels. This range means you can use it immediately in almost any application—from Adobe Illustrator to a Cricut cutting machine. The outline is clean, with no extraneous clutter, so you can focus on integrating it into your own creative process.
Where the Triangle Ruler Outline Fits in Your Project Workflow
Every project has three phases: preparation, execution, and refinement. The Back to School Triangle Ruler Outline works well across all of them, depending on your role and goals.
Before the Project: Planning and Asset Collection
In the planning stage, you gather resources that will save you time later. Instead of drawing a ruler shape from scratch or searching for a free vector that may have messy lines, you can download this set and have a reliable base ready. If you are designing a series of back-to-school items, such as bookmarks, bulletin board borders, or geometry worksheets, the triangle ruler outline becomes part of your asset library. You can open the AI or EPS file, preview the shape, and decide how to combine it with other elements—like a protractor outline, a compass, or a school bus silhouette. Knowing you have this asset on hand means you spend less time hunting for visuals and more time planning layout and messaging.
During the Project: Direct Integration into Your Design Tools
When you start creating, the right file format makes all the difference. If you work in Adobe Illustrator, open the AI or EPS file and immediately begin editing. The outline is a vector path, so you can change the stroke weight, color, or fill with a few clicks. For web-based tools like Canva or Figma, the SVG and PNG formats are ideal. The SVG preserves vector scalability, while the high-resolution JPG or PNG serves as a quick placeholder. If you use a cutting machine for stickers, labels, or classroom cutouts, the DXF file ensures compatibility with Silhouette Studio or Cricut Design Space. This format flexibility means you can move from concept to finished product without conversion headaches.
During execution, the triangle ruler outline interacts with other resources seamlessly. For example, you might import the SVG into a classroom newsletter template, then overlay it with bold text reading “Math Rules.” In a teaching resource, you could place the ruler near a problem block to indicate a measurement activity. Because the outline is a simple shape, it does not compete with other graphic elements—it supports them. You can resize it without losing quality, rotate it, or duplicate it multiple times to build patterns or borders.
After the Project: Reuse and Repurposing
Once your initial project is done, the file set remains useful for future work. The same triangle ruler outline can be recolored, combined with different fonts, or used as a cut file for different seasons. If you run an Etsy shop selling back-to-school SVG bundles, this shape can be mixed with other school icons to create new designs each year. The PNG and JPG versions can be archived for quick access in presentations or social media posts. The long-term efficiency comes from having a consistent graphic element that you can pull into any project without redrawing it.
Practical Implementation Tips for Different Users
To get the most out of the Back to School Triangle Ruler Outline, think about your specific use case and how you handle digital files day to day. Below are practical tips tailored to common user profiles.
For Teachers and Educators
You likely need materials that are clear, reproducible, and engaging. The outline can be used to create worksheets where students measure triangles, connect geometry concepts to real tools, or design their own rulers. Paste the ruler into a word processor via the JPG or PNG, or use the SVG in Google Slides for interactive whiteboard activities. Keep the original files in a folder named “Math Graphics” so you can find them quickly during lesson planning. For bulletin boards, enlarge the SVG using a projector or upload it to a poster maker—the vector format ensures the edges stay crisp even at large sizes.
For Small Business Owners and Entrepreneurs
If you sell educational printables, planners, or clip art, the file set gives you a professional starting point. Open the AI file and add your own brand colors and patterns. You can create a set of geometry-themed clip art by combining the triangle ruler with a compass and protractor outlines. Use the DXF to test-cut sticker sheets and offer them as physical products. Remember to check the canvas size (1920x1280) before placing into larger templates—it is large enough for most projects, but you might need to group and scale it into a smaller dimension for product listings. The consistent outline helps maintain a cohesive style across your product line.
For Bloggers and Content Creators
Back-to-school content often needs visual aids to explain concepts or illustrate posts. The PNG and JPG files work well for featured images or in-body graphics. Insert the ruler into a blog post about preparing for geometry class, or use it in a tutorial about measuring angles. Since the files are high resolution, they also work for social media graphics—just crop or mask as needed. Keep a copy of the SVG on your desktop for quick mockups in Canva or Adobe Express. The simple outline often pairs well with bold typography and bright colors.
For Freelancers and Design Professionals
You may need a clean vector shape that you can modify heavily. The AI and EPS files allow deep editing: you can expand the stroke, convert it to a fill, add gradient effects, or combine it with other vector shapes using pathfinder tools. If a client requests a custom school logo featuring a ruler, you have a solid base to start from. The outline is neutral enough that it does not dictate a particular style, so you can adapt it to minimalist, cartoon, or vintage looks. Use the SVG for prototyping in UI design tools, and keep the DXF on hand if you ever need to prototype physical die-cuts.
Organizational Habits for Long-Term Use
A digital asset is only as useful as your ability to find and open it. When you download the files, rename them clearly. For example, “triangle-ruler-outline.ai” or “back-to-school-ruler.svg.” Store them in a dedicated folder on your cloud drive or local machine. If you work with a team, use a shared library with consistent naming conventions. The six-file set can be kept together in a single subfolder labeled “School Graphics.” Over time, you may accumulate similar shapes—protractor, compass, pencil, apple. Grouping them logically saves time and reduces frustration.
Another tip: create a template file in your design program that already has the triangle ruler placed on a blank canvas at the correct size. This way, every new project starts with the asset in place. You can also set up a color palette that matches your brand or school colors and apply it to the outline. The efficiency gain is small per project but adds up significantly over a semester or a product launch season.
Quality Control and Consistency
Because the outline comes as a cleaned-up vector, you should inspect it briefly before heavy use. Open the AI or SVG file and check that all anchor points are smooth and that the stroke is uniform. If you want to ensure pixel-perfect rendering for digital screens, confirm that the canvas dimensions (1920x1280) match your output requirements. For print use, the PNG and JPG are high enough resolution for standard 150–300 DPI output at small sizes, but for large posters, you might want to work exclusively with the vector formats to retain maximum quality.
Consistency matters when you use the same shape across multiple projects. If you change the stroke weight in one file but not another, your visuals may look mismatched. To avoid this, decide on a uniform stroke thickness early—say 4px for digital work or 0.5pt for print borders—and apply it to the AI master file. Then re-export your SVG, DXF, and PNG from that master. This habit keeps your assets coherent and professional.
Combining the Ruler Outline with Other Tools and Methods
No graphic resource exists in isolation. The triangle ruler outline shines when you pair it with complementary design elements. For instance, if you are creating a geometry-themed sticker pack, combine this outline with a protractor SVG, a pencil icon, and a calculator shape. The ruler provides structure; the other elements add variety. If you use a layout grid or a guide system, the ruler outline can anchor the corner of a worksheet or serve as a decorative border element.
In terms of software workflow, the different formats allow cross-platform use. You might design the main artwork in Illustrator (using the AI file), then export a PNG for a blog, an SVG for a website icon, and a DXF for a die-cut order. The process is smooth when you understand which format to use for each output. Quick reference: AI/EPS for full editing, SVG for web and responsive design, DXF for hardware cutting, JPG/PNG for raster applications.
Real Workflow Example: Creating a Classroom Banner
Imagine you are a teacher preparing a “Welcome Back to Math Class” banner. You have the Back to School Triangle Ruler Outline in your assets folder. You open the AI file and resize the ruler to a width of 4 inches. You then duplicate it several times across an artboard. Next, you change the strokes to bright blue, green, and yellow. You add a text overlay saying “Math is Everywhere” using a bold sans-serif font. The final design prints cleanly on cardstock. Later, students use the banner as a backdrop for a photo. In this workflow, the outline served as the central visual motif, but it was flexible enough to be recolored and repeated. Without it, you would have spent extra time drawing a ruler that might not look consistent.
Another scenario: a freelance designer is creating a set of back-to-school digital papers for a client. They open the EPS file and rotate the ruler 45 degrees. They apply a pattern overlay and a transparency mask, then use that as a background texture. The outline is used not as a static shape but as the basis for an abstract repeating pattern. This shows how one asset can be adapted far beyond its original presentation.
Long-Term Value and Scalability
The best digital assets are those you can use repeatedly without modification becoming a chore. Because the triangle ruler outline is a single, simple vector, it is inherently scalable. You can embed it in a wide variety of projects, from a small social media graphic to a full-page worksheet. Over a year, you might use it in several dozen projects, each time slightly differently. The initial download cost is low, but the cumulative time savings and quality consistency make it a solid addition to any creator's toolkit.
Moreover, the file set comes from a creator who provides clear naming and multiple formats—a sign of a resource designed with practical use in mind. When you thank the product owner, you are also acknowledging the thought that went into making the files easy to edit and deploy. That attention to compatibility and usability is exactly what busy professionals need.
Final Practical Observations
Before you start using the outline, take five minutes to preview each file in its native application. Check that the stroke lines are visible and that the shape is centered on the canvas. If you plan to use the DXF, test a small cut to ensure the cutting machine reads the path correctly. For SVG, open it in a browser to verify rendering. These quick checks prevent surprises mid-project.
Keep the original ZIP folder intact as a backup. If you ever need a fresh copy, you have it. When you share the asset with a colleague or client, send the format they need—avoid sending the entire set if they only require a PNG. Good file management reflects professionalism and respect for others' time.
The Back to School Triangle Ruler Outline is a small piece of a larger puzzle, but it is the kind of resource that, once in your workflow, you will reach for again and again. Its simplicity is its strength. By understanding how to integrate it before, during, and after your projects, you turn a basic outline into an efficient tool for productivity, creativity, and consistent visual communication.